
“Creativity is inventing, experimenting, growing, taking risks, breaking rules, making mistakes, and having fun.”
Mary Lou Cook Tweet
Table of Contents

What is Salt Painting?
Salt painting is a beautiful technique that involves sprinkling salt over wet glue, then painting it with watercolor paint. My students and I have been experimenting with some really cool materials and tools lately. Salt painting has definitely become one of our favorites. I thought painting with a fork was pretty amazing but there’s something magical about the way the salt absorbs the watercolor paint from the tip of your brush.
A little paint goes a long way because it literally runs through the salt. You’ll see what I mean when you try it!
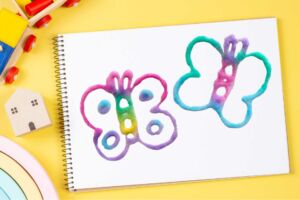
This salt painting art can be used to make some Easter cards or you can display them on a bulletin board.
I’ve included my free Easter egg printable below but you also draw your own egg or use a different image altogether.

This post may contain affiliate links and I may earn a small commission when you click on the links at no additional cost to you. As an Amazon Affiliate, I earn from qualifying purchases. You can read my full disclaimer here.
Tips for Tracing onto Thick Paper
We used thick watercolor paper for our Easter Egg salt painting. Tracing onto thick paper, using a window is a handy trick when you don’t have a lightbox lying around. First of all, find yourself a window with some good natural light. Place your reference picture behind the thick paper you’re tracing on and hold it up to the window. You can use tape to hold everything in place if you like.
The sunlight filtering through the window will act as your backlight, making it easy to see through the thick paper. Now, grab a pencil or pen and trace away! Just make sure to hold everything steady so your tracing comes out nice and neat. It’s a simple workaround that gets the job done without any fancy equipment.

Making a salt painting is easy peasy! First of all, get some glue and squeeze it out to make whatever design you’re feeling – in this case Easter eggs, using our Free Easter egg templates.
Then, while the glue is still wet and sticky, sprinkle some salt all over it. The salt sticks to the glue like glue to paper (pun intended), creating this awesome textured effect. After that, you break out the watercolors and start painting over the salt-covered glue. The colors spread and blend in the coolest way, kind of like watercolor fireworks. It’s a super fun and easy way to add some pizzazz to your art projects.
Scroll down to see our step by step instructions with detailed pictures.
How Do I Preserve My Salt Painting?
Salt painting preserves best when it’s sprayed with a sealant. However, If the salt starts to fall off, you can simply remove all of the salt to reveal a beautiful watercolor painting underneath.
Here are a few other activities that you’re going to love:


Salt Painting - Easter Craft Step by Step
Appropriate for Children Ages 6 and up
Difficulty: Easy
Total Time: 1 X60 minute block Plus at least 24 hours to dry
Materials:
- Watercolor paper
- Watercolor paint or Food Coloring
- Table salt (any salt will be fine)
- Elmer’s White Glue (this is our brand of preference)
- Paintbrush
- Water for diluting your watercolor paint and for rinsing your brush
- Pencil for tracing your templates onto watercolor paper
- Baking tray or something to catch the salt as you sprinkle it on
- Free Easter egg templates (6 designs to choose from)

Tips for Salt Painting
- Keep your watercolors concentrated, so they’re vibrant
- Paint the salt right away so it doesn’t clump
- Place your paper into a baking tray before sprinkling the salt to make clean up easier
- Cover your workspace
Instructions:
Step 1 – Print out your Easter egg templates and trace
We printed our Easter egg template onto regular paper, then traced it onto thicker watercolor paper. Place your Easter egg picture behind the thick watercolor paper you’re tracing on and hold it up to the window. Trace 🙂


Step 2 – Trace the lines with glue
Gently squeeze your glue bottle and trace over the lines of your Easter egg drawings. You can play with the thickness of your glue lines by adjusting the glue nozzle or by adjusting the amount of pressure that you use to squeeze the bottle.


Step 3 - Sprinkle salt onto the wet glue
Place your wet glue design in a baking tray, or onto an easy to clean surface before sprinkling on the salt. Generously pour the salt onto the wet glue. Coat every line.
Tip: You can store the excess salt in a Ziplock bag/container and reuse it in other art projects


Step 4 – Shake off the excess salt
Shake the excess salt off into the baking tray. Try to shake the salt off gently, so your wet glue remains intact.


Step 5 – Paint with watercolors
I suggest that you paint your Easter eggs right away! Saturate your paintbrush with watercolor paint, so that the paint spreads through the salt when you’re painting.
The paint will run along the salt and create a really cool effect. You can experiment with color blending and see what happens when certain colors run together. My kids loved this part!
We used rainbow colors for our eggs but you can experiment with pastel or monochromatic color harmonies to create beautiful results.


Step 6 - Let Dry
Your salt painting will take several hours to dry. We let ours dry overnight. As an extension you can also paint the spaces between your glue lines with watercolor paint.
The colors will fade slightly as your painting dries and the results will be stunning.

You’re going to want to share these salt paintings with your friends and loved ones!
Creating a salt painting with glue and watercolor paint is a great way to unleash your creativity. With just a few simple ingredients and a whole lot of imagination, you can create stunning works of art that are sure to impress. So grab your glue, sprinkle on some salt, and let your inner artist shine!
If you’ve tried this salt painting activity with your kids or students, please let me know! I’d love to add your creations to our gallery, so upload your photos or send them directly to me at: [email protected] Thank you!
You can also tag us if you post your masterpieces on Instagram or Facebook.
We have several other activities that you and your kids will also love:

Looking for even more cool activities? You might be interested in our Kindness Begins with Me coloring book series! Click HERE or on the image below to learn more.

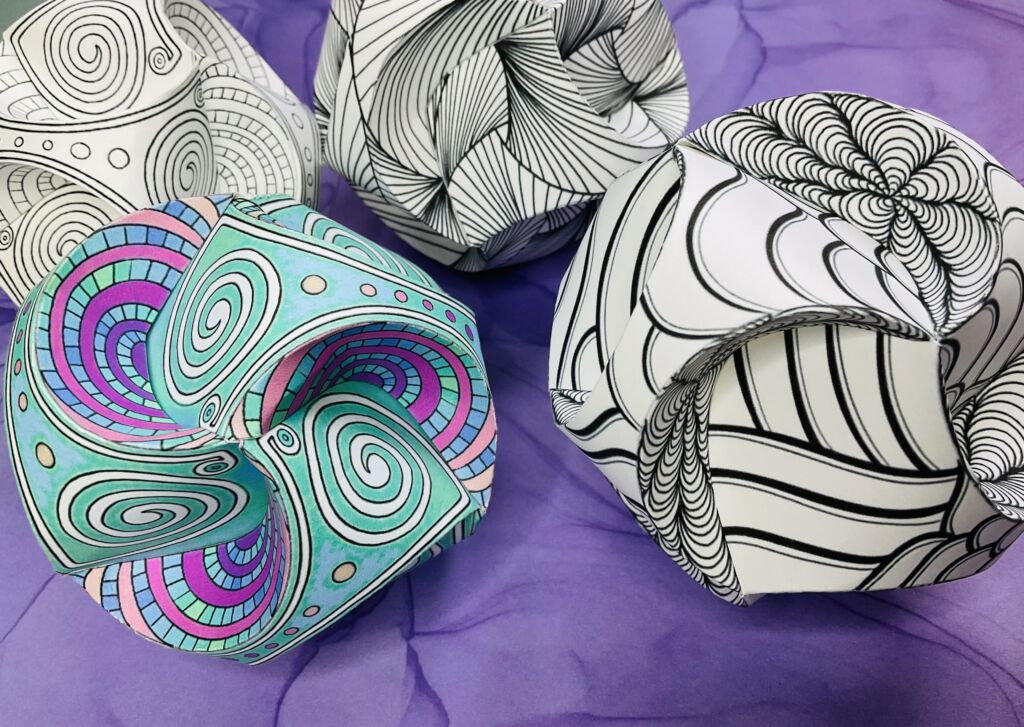
If you love Zentangle designs as much as we do, you’re going to love our Zentangle pyramid activity. Click HERE to check it out or click on the images below.

Final Thoughts
If you’re looking for more activities designed to encourage mindfulness and spark creativity, check out my printable resources below or visit my shop!


Don’t forget to download our free 15 page Mindfulness coloring book to help add a few mindful moments to your child’s day. Just click here or the image below!
