“Art is as natural as sunshine and as vital as nourishment.”
MaryAnn F. Kohl Tweet
Table of Contents

What is Raised Salt Painting?
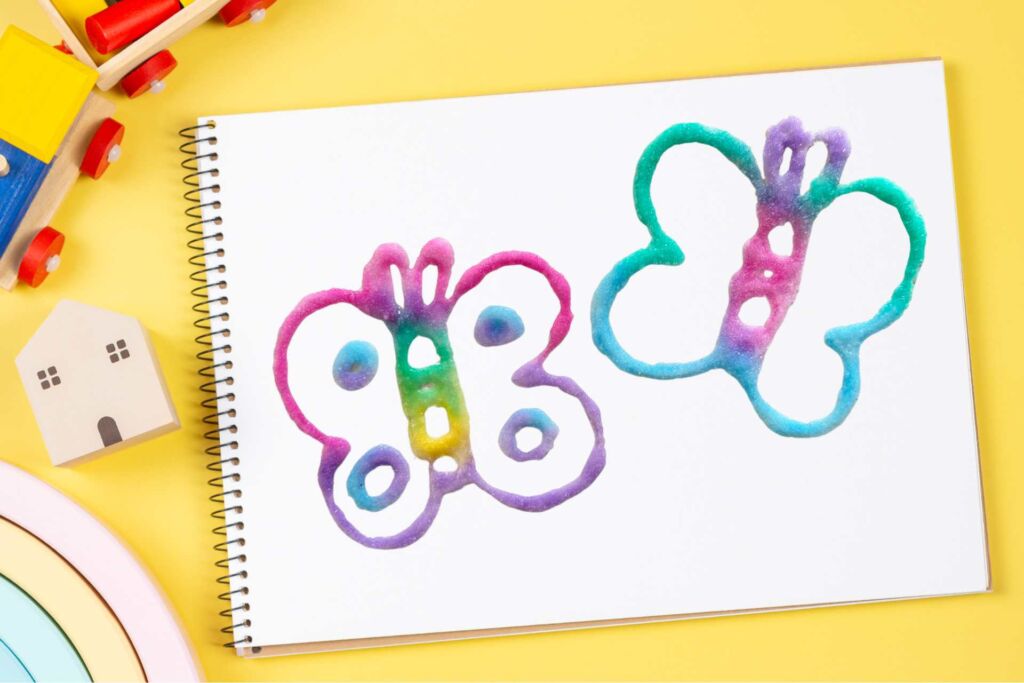
Raised salt painting involves using a mixture of watercolors or liquid watercolor paints, glue, and salt to create unique and vibrant artworks. This is a fun watercolor method where you draw your design with glue, cover it with salt, paint the salt with watercolors, then let it dry. It’s so fun to watch the paint spread across the salt and the glue and salt combined give the finished product a really cool effect!
The salt absorbs the paint, causing it to spread and create beautiful patterns with a distinctive texture. The process is easy, affordable, and incredibly rewarding, making it a popular choice for art enthusiasts of all ages.
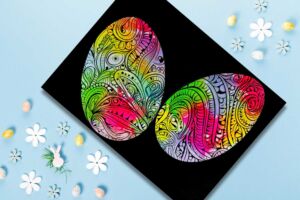
We made raised salt painted butterflies, but this activity can be adapted for any art image you’d like! We also used this technique to create beautiful salt painted Easter eggs.
You can grab our free salt painting butterfly template and trace it onto watercolor paper to complete this craft. Just click HERE or the image below to download it today.

This post may contain affiliate links and I may earn a small commission when you click on the links at no additional cost to you. As an Amazon Affiliate, I earn from qualifying purchases. You can read my full disclaimer here.
Why is Salt Painting Great for Kids?
Here are 4 reasons why salt painting is a fantastic activity for kids to try!
Provides a Sensory Experience: Salt painting provides a sensory-rich experience for children, engaging their sense of touch, sight, and creativity. The texture of the salt combined with the fluidity of the paint offers a unique tactile experience that can be both relaxing and stimulating.
Helps with Fine Motor Skills Development: As kids sprinkle salt and apply paint, they are refining their fine motor skills and hand-eye coordination. This process encourages precision and control, helping children develop important foundational skills for writing, drawing, and other activities.
Encourages Artistic Expression: Salt painting encourages artistic expression and experimentation. Children can explore different color combinations, techniques, and patterns, fostering their imagination and allowing them to express their ideas and emotions through art.
Provides a Doorway to Scientific Exploration: Salt painting also provides an opportunity for learning about science and chemistry. Children can observe how the salt interacts with the paint, creating unique textures and effects. It sparks curiosity and encourages them to ask questions about the properties of materials.
Tips for Tracing onto Thick Paper
We used thick watercolor paper for our butterfly salt painting. Tracing onto thick paper, using a window is a handy trick when you don’t have a lightbox lying around. First of all, find yourself a window with some good natural light. Place your reference picture behind the thick paper you’re tracing on and hold it up to the window. You can use tape to hold everything in place if you like.
The sunlight filtering through the window will act as your backlight, making it easy to see through the thick paper. Now, grab a pencil or pen and trace away! Just make sure to hold everything steady so your tracing comes out nice and neat. It’s a simple workaround that gets the job done without any fancy equipment.

Raised Salt Painting Techniques:
- Use Thick Paper: Opt for heavy or thick paper that can withstand the moisture from the paint and salt without warping or tearing.
- Experiment with Different Salts: Try using different types of salt, such as coarse salt or rock salt, to achieve varying textures and effects in your paintings.
- Let It Dry Naturally: Allow your salt paintings to air dry naturally. Avoid using heat sources like hairdryers, as they can cause the salt to melt and lose its textured appearance.
- Seal the Artwork: Once the painting is fully dry, consider sealing it with a spray fixative to protect the salt and preserve the artwork for years to come.
Ready to embark on a salt painting adventure? Scroll down to see our step by step instructions with detailed pictures.
Here are a few other activities that you’re going to love:


Our Zentangle course is here!
Are you trying to find ways to incorporate self-care and creativity into your life? Would you like to introduce the Zentangle Method to your children or students but you’re not sure how?
If you answered yes to any of these questions then you’re going to love our new course. If you haven’t had a chance yet to watch the course overview video, check it out below!
Raised Salt Painting - Butterfly Craft Step by Step
Appropriate for Children Ages 6 and up
Difficulty: Easy
Total Time: 1 X60 minute block Plus at least 24 hours to dry
Materials:
- Watercolor paper
- Watercolor paint or Food Coloring
- Table salt (any salt will be fine)
- Elmer’s White Glue (this is our brand of preference)
- Paintbrush
- Water for diluting your watercolor paint and for rinsing your brush
- Pencil for tracing your templates onto watercolor paper
- Baking tray or something to catch the salt as you sprinkle it on
- Free butterfly templates

Tips for Salt Painting
- Keep your watercolors concentrated, so they’re vibrant
- Paint the salt right away so it doesn’t clump
- Place your paper into a baking tray before sprinkling the salt to make clean up easier
- Cover your workspace
Instructions:
Step 1 – Print out your butterfly templates and trace
We printed our butterfly template onto regular paper, then traced it onto thicker watercolor paper. Place your butterfly picture behind the thick watercolor paper you’re tracing on and hold it up to the window. Trace 🙂


Step 2 – Trace the lines with glue
Gently squeeze your glue bottle and trace over the lines of your butterfly drawings. You can play with the thickness of your glue lines by adjusting the glue nozzle or by adjusting the amount of pressure that you use to squeeze the bottle.


Step 3 - Sprinkle salt onto the wet glue
Place your wet glue design in a baking tray, or onto an easy to clean surface before sprinkling on the salt. Generously pour the salt onto the wet glue. Coat every line.
Tip: You can store the excess salt in a Ziplock bag/container and reuse it in other art projects


Step 4 – Shake off the excess salt
Shake the excess salt off into the baking tray. Try to shake the salt off gently, so your wet glue remains intact.

Step 5 – Paint with watercolors
I suggest that you paint your butterflies right away! Saturate your paintbrush with watercolor paint, so that the paint spreads through the salt when you’re painting.
The paint will run along the salt and create a really cool effect. You can experiment with color blending and see what happens when certain colors run together. This part was super cool!
We used colors that reminded us of Spring for our butterflies but you can experiment with pastel or monochromatic color harmonies to create beautiful results.


Step 6 - Let Dry
Your salt painting will take several hours to dry. We let ours dry overnight. As an extension you can also paint the spaces between your glue lines with watercolor paint.
The colors will fade slightly as your painting dries and the results will be stunning.

You’re going to want to share these salt paintings with your friends and loved ones!
Creating a salt painting with glue and watercolor paint is a great way to unleash your creativity. With just a few simple ingredients and a whole lot of imagination, you can create stunning works of art that are sure to impress. So grab your glue, sprinkle on some salt, and let your inner artist shine!
If you’ve tried this salt painting activity with your kids or students, please let me know! I’d love to add your creations to our gallery, so upload your photos or send them directly to me at: [email protected] Thank you!
You can also tag us if you post your masterpieces on Instagram or Facebook.
We have several other activities that you and your kids will also love:
Looking for even more cool Spring activities? You might be interested in our Dainty Daisy Reverse coloring pages. Just click on the picture below to learn more or click HERE to browse through our collection of reverse coloring pages.

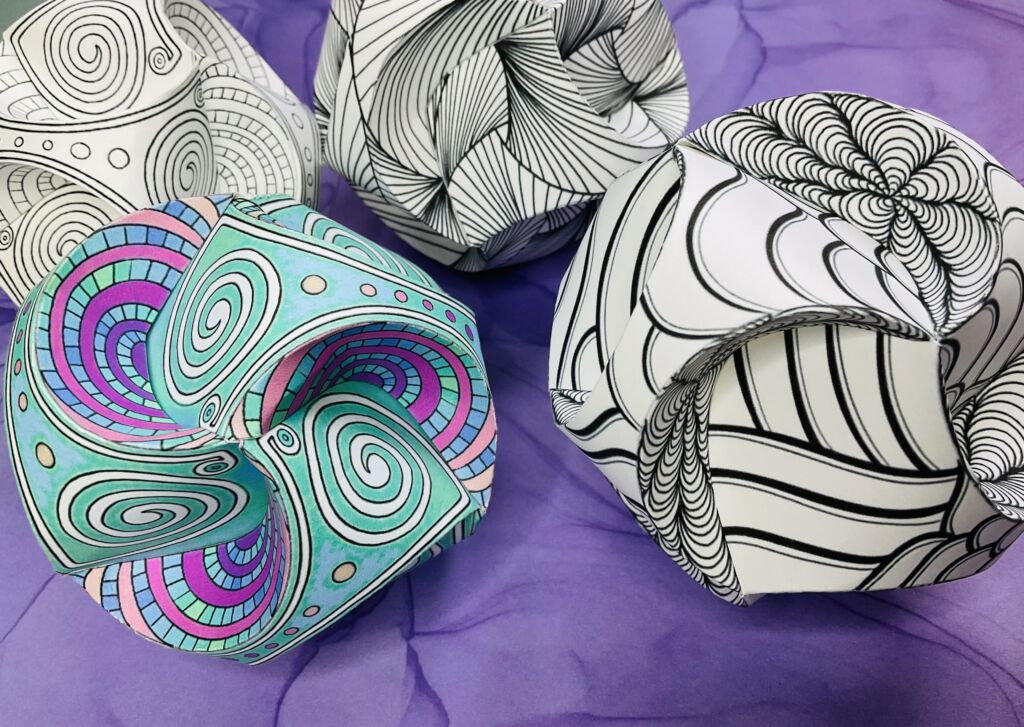
If you love Zentangle designs as much as we do, you’re going to love our Zentangle pyramid activity. Click HERE to check it out or click on the images below.

Final Thoughts
If you’re looking for more activities designed to encourage mindfulness and spark creativity, check out my printable resources below or visit my shop!


Don’t forget to download our free 15 page Mindfulness coloring book to help add a few mindful moments to your child’s day. Just click here or the image below!
