“Everything starts from a dot.”
Wassily Kandinsky Tweet
Table of Contents

Q-Tip Painting
Are you ready to explore a super cool painting activity that your kids will absolutely love? Look no further than Q-tip painting! Not only is it a fun, easy, and cost-effective activity, but it also provides surprising benefits for your child’s development. From improving fine motor skills to enhancing creativity, Q-tip painting has it all.
We love exploring different painting techniques! Some of our favorites include blow painting and splatter art. After all, who said that painting had to be done with a brush?
In this blog post, I’ll show you how you could take a simple butterfly drawing and transform it into a lovely painting using Q-tip.
You can use one of our butterfly templates to complete this painting activity or you can learn how to draw a simple butterfly HERE and paint that instead.
So, keep reading to check out our step by step tutorial and to learn about the surprising benefits of Q-tip painting for kids.
This post may contain affiliate links and I may earn a small commission when you click on the links at no additional cost to you. As an Amazon Affiliate, I earn from qualifying purchases. You can read my full disclaimer here.
Surprising Benefits of Q-tip Painting for Kids
Q-tip Painting Improves Fine Motor Skills
Q-tip painting not only provides a fun and entertaining activity for children, but it also helps improve their fine motor skills. By using small cotton swabs to paint, kids are honing their dexterity and hand-eye coordination. They learn to control their movements and apply just the right amount of pressure to create the desired effect. These skills are crucial for many everyday tasks, such as writing and using utensils, and Q-tip painting is an enjoyable way to develop them.
Q-tip Painting Encourages Creativity
Moving on to another important benefit, Q-tip painting encourages creativity. When kids are engaged in Q-tip painting they are not limited by traditional paintbrushes and can explore different techniques and patterns using the unique shape of the Q-tip. They get to experiment with color combinations and create their own unique masterpieces. It’s a great way for children to express themselves and let their imagination run wild.
Through Q-tip painting, children can learn to think outside the box and become more resourceful in their approach to art. Encouraging creativity through this fun activity can also have a positive impact on their overall development, such as improving problem-solving and critical thinking skills. It’s a great way for kids to develop their own artistic style and build their confidence.
Q-tip Painting Helps With Hand-Eye Coordination
Another benefit of Q-tip painting is the improvement of hand-eye coordination. This skill is essential for many activities that our kids partake in such, playing sports or even using utensils during mealtime. Through Q-tip painting, children can practice their hand-eye coordination by carefully dabbing the paint onto the paper with precision. This helps to develop their fine motor skills as well.
The following activities also have incredible benefits for your kids:
Here are a few other activities that your kids are going to love:


Step by Step Tutorial
Appropriate for Children Ages 2 and up
Difficulty: Easy
Total Time: 2 x 20 minute blocks
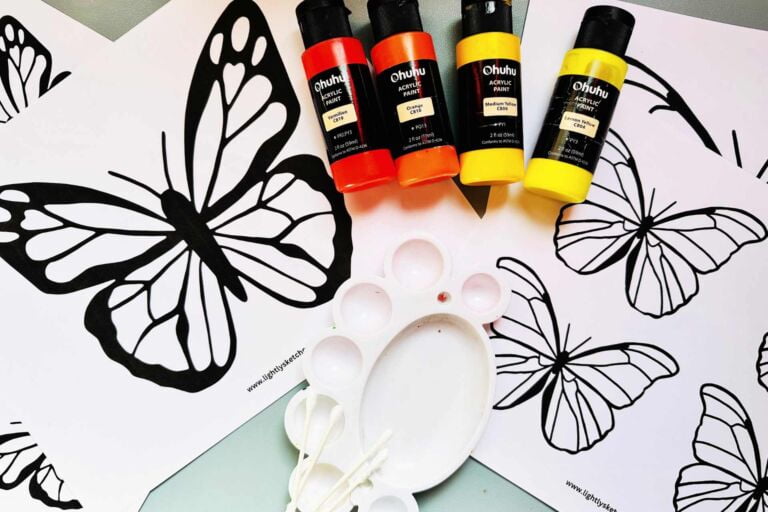
Materials:
- Butterfly Templates or click HERE to learn how to draw a simple butterfly.
- White Cardstock or blank paper (8 1/2 X 11) for printing or drawing your butterfly.
- Acrylic Paint
- Q-tips
- Paint Tray
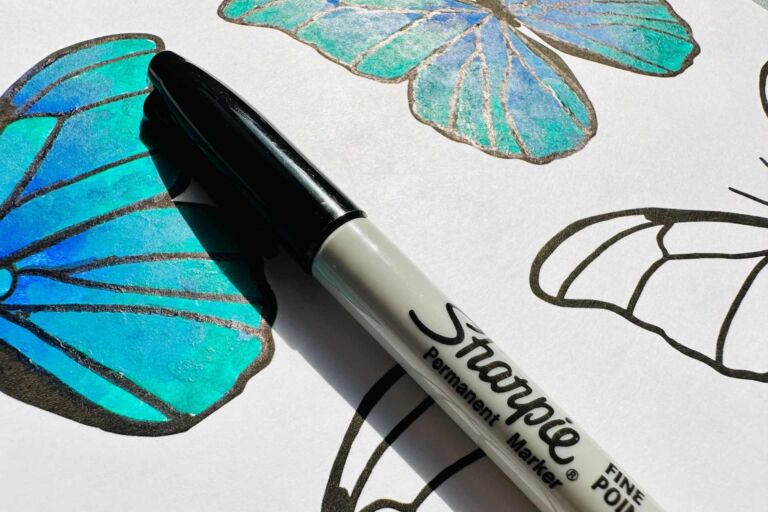
- Micron Pens for outlining your butterfly if you paint outside the lines. Or you could also use a black sharpie.
- Pencil and eraser if you’re drawing your butterfly (optional)
- Scissors for cutting out your butterfly(optional)
- Markers/pencil crayons/pastels etc. for coloring the back of your butterfly if you cut it out(optional)
- Ruler for bending the wings (optional)
Instructions:
Step 1 – Print your templates or draw your butterfly.
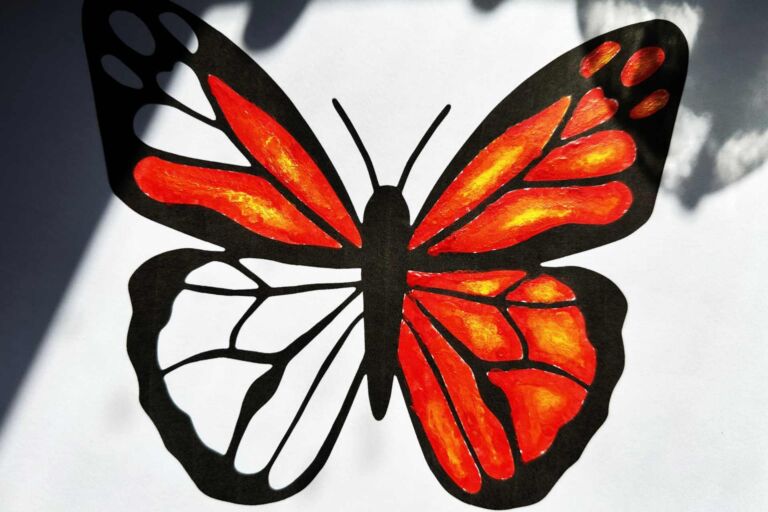
Print your butterfly templates on cardstock or blank paper. We used the full page monarch butterfly template for this tutorial.
sections.

Step 2 – Prepare Your Paint Tray
Choose a few colors that you’d like to use for your butterfly and pour them into your paint tray. You might want to limit your students to 3-5 colors, or have them choose a color harmony (warm/cool, complementary etc.), or their paint choices can be based on their personal preference.
Step 3 - Get Your Q-tips ready
You will need at least 2 Q-tips per color 🙂 and a few extra Q-tips for blending. We used 10 Q-tips total.
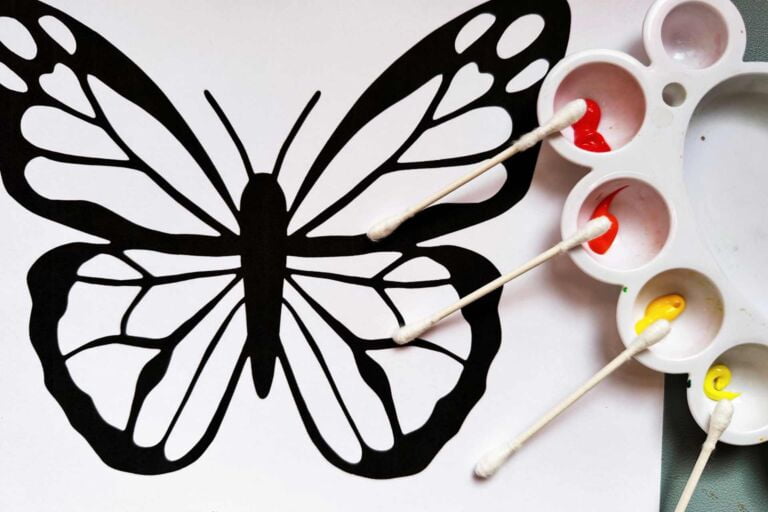
Step 4 - Start Painting
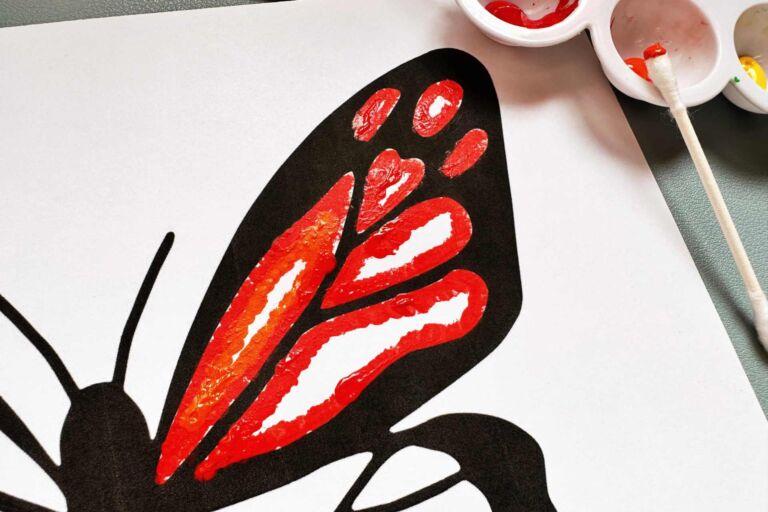
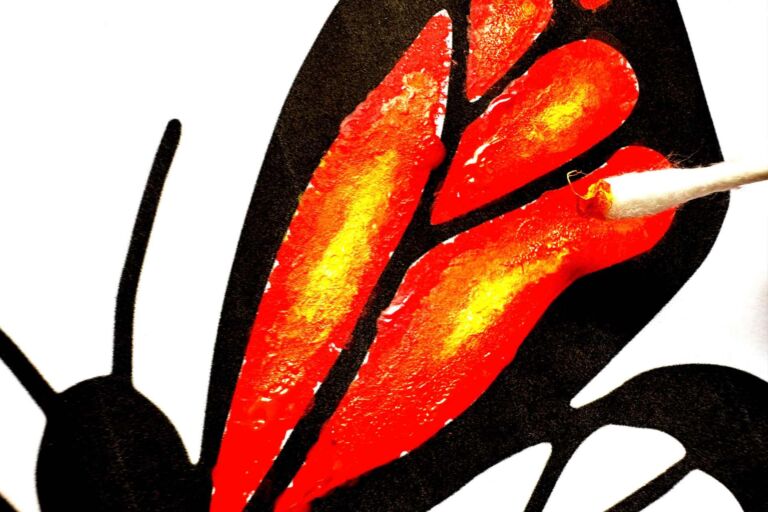
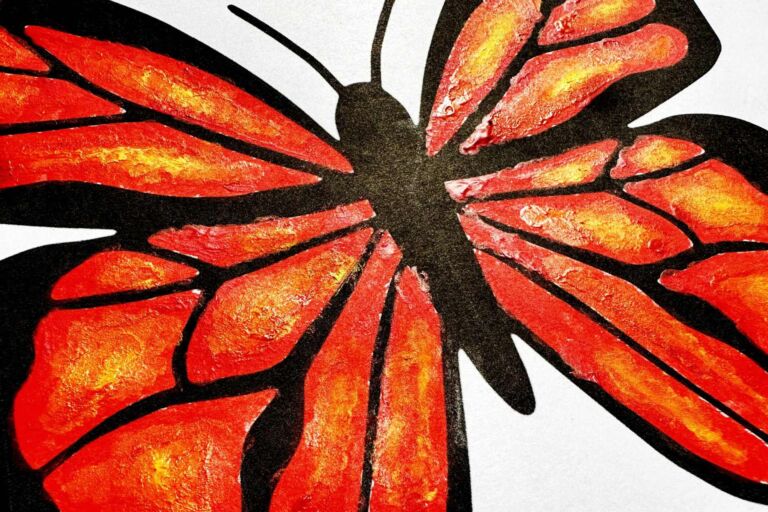
Dip your Q-tip in a paint color of your choice and start to “dot on” a design. For our butterfly, we started with our darkest color first to create an outline. Your kids can apply the paint in any order they’d like.

After applying our darkest color, we used our lighter colors to fill in the rest of our butterfly.

Step 5 - Blend
Using another clean Q-tip, blend your colors. I dabbed the Q-tip gently in the paint to blend the colors.
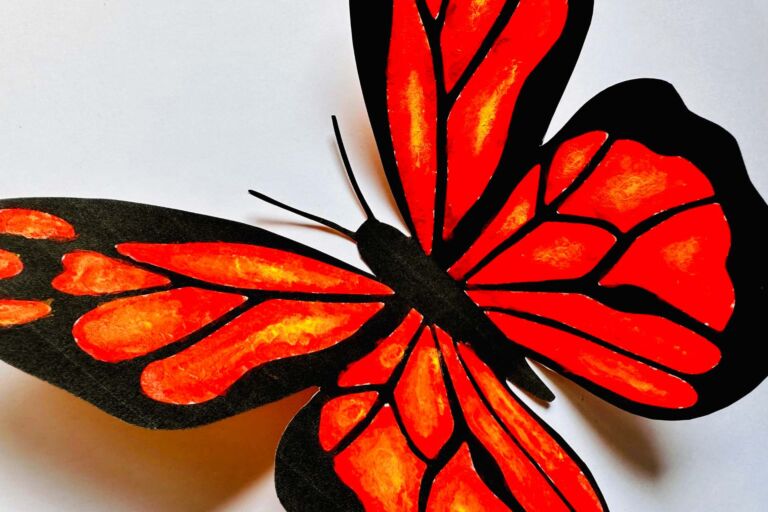
Step 6 – Repeat step 4 in the remaining wings.
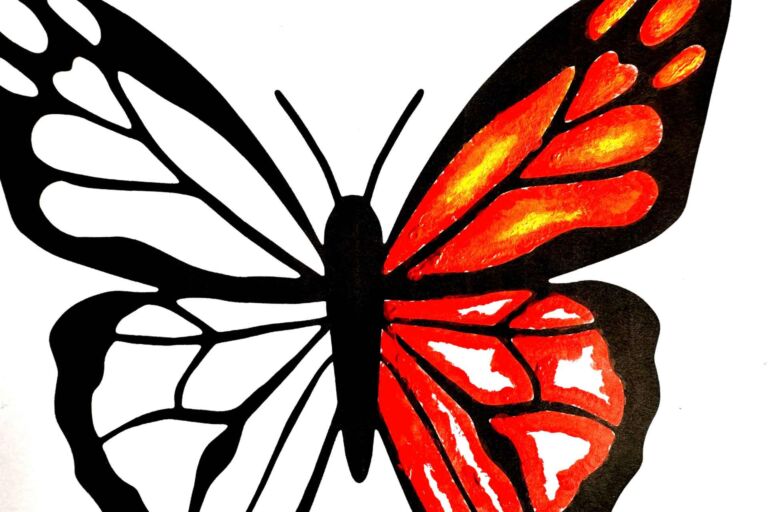
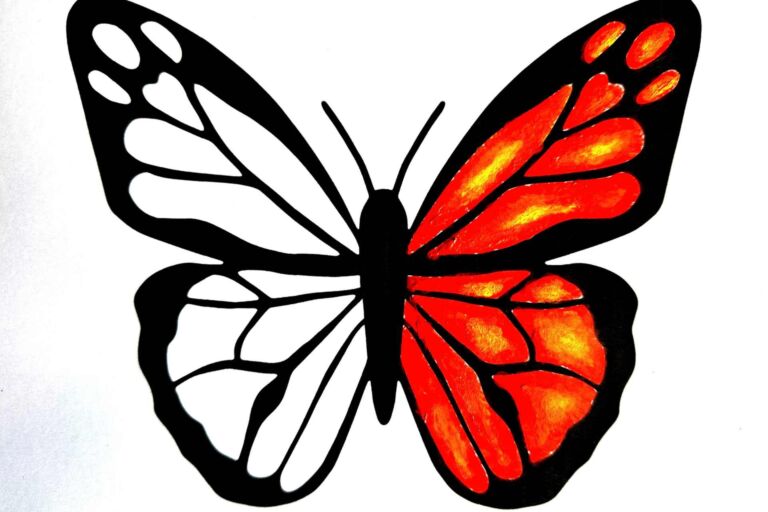


Tip: If you painted outside of the lines don’t worry 🙂 Once your butterfly is dry, you can use a sharpie to “clean up” the black sections of your butterfly.
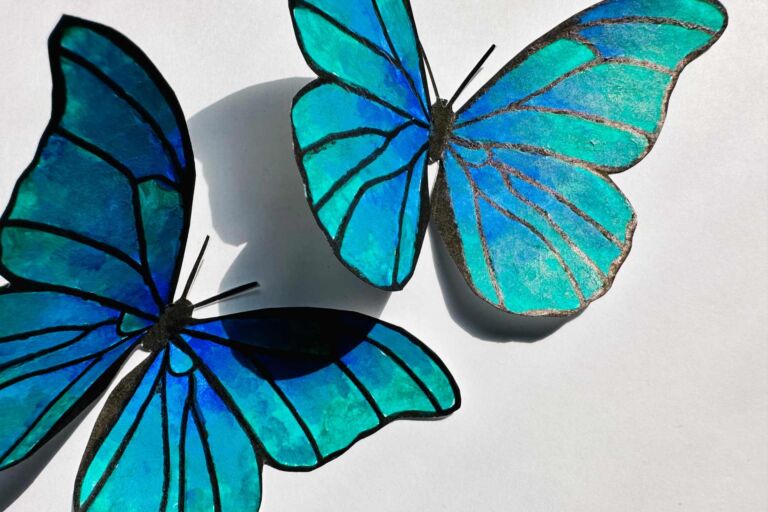
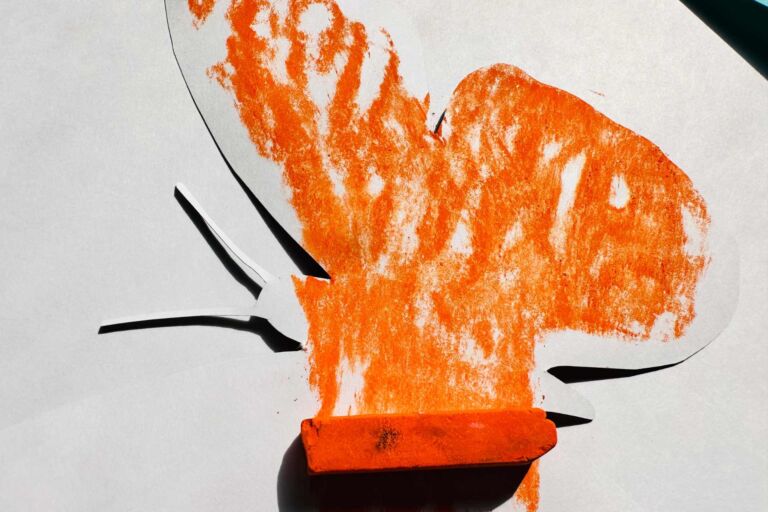
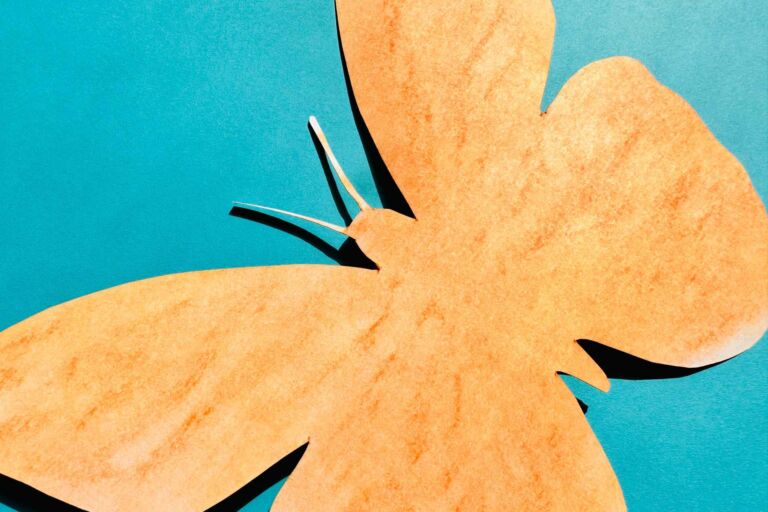
Step 7 – Cut out your butterfly (optional).
If you’d like to use your butterflies on a bulletin board or hang it in your child’s room, carefully cut it out once it’s dried. We colored the back of our butterfly with an orange pastel but you could leave it white or color it with any coloring tool of your choice.
Step 8 – Using a ruler, gently fold the wings upward to create a 3D effect.

Feel free to experiment with different color combinations! Here’s one of our butterfly templates painted with a Q-tip in shades of blue.


Step 9 - Enjoy and Share
This beautiful butterfly Q-tip painting is the perfect addition to any card or nature unit. This activity can be used for Mother’s Day, birthdays or it can be used to compliment topics discussed in class.
If you paint this butterfly with your kids or students, please let me know! I’d love to add your creations to our gallery, so upload your photos or send them directly to me at: [email protected] Thank you!
You can also tag us if you post your masterpieces on Instagram or Facebook.

Looking for even more cool activities? You might be interested in our Zentangle Paper Globes. Click HERE or on the image below to learn more.

If you love zentangles as much as we do, you’re going to love our zentangle pyramid activity. Click HERE to check it out or click on the images below.
Final Thoughts
If you’re looking for more activities designed to encourage mindfulness and spark creativity, check out my printable resources below or visit my shop!


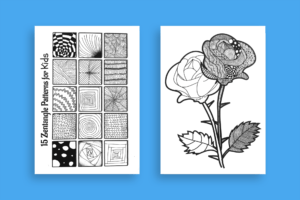
Don’t forget to download our free 15 page Mindfulness coloring book to help add a few mindful moments to your child’s day. Just click here or the image below!
