Sensory bottles can be used to reinforce math concepts, language skills, social skills and engage children in science exploration. These bottles are also known as calming jars, discovery bottles, sensory jars, calm down jars, to name a few. They can be created utilizing simple objects from around your house, such as beads, gems, toys, etc. so they are often inexpensive to make and durable. Sensory bottles are the perfect addition to any calming kit or calming spaces that you might have in your home or classroom. They can be used instead of a time-out, or provide children with a break from stress or anxious feelings. All you need to do is find a bottle, add some objects of your choice, fill the bottle with a liquid such as water, oil, or glue, seal it with a lid, shake, and enjoy!
Creating Mindfulness
Sensory bottles can induce mindfulness because whenever we focus our attention on our senses, we are being mindful. Using sensory bottles appeals to the senses, particularly, sight and touch. So children are able to take their attention off of worrying or stressing and reduce the business in their minds by simply shaking these bottles and watching the object gently move around. Helping children focus on their senses can have an extremely calming affect and reinforces the good feelings that are associated with mindfulness.
This post may contain affiliate links and I may earn a small commission when you click on the links at no additional cost to you. As an Amazon Affiliate, I earn from qualifying purchases. You can read my full disclaimer here.

Why are Glitter Sensory Bottles so Amazing?
Glitter sensory bottles are fantastic for helping kids calm down, plus they are super fun to make. These beautiful bottles have the added benefit of containing glitter that can swirl slowly or move quickly, depending on the viscosity of the liquid that you use. The thicker the liquid (glue or oil) the slower the glitter will move and circulate. When using a glitter calming bottle you can ask kids to count the number of seconds it takes for the glitter to settle at the bottom of the bottle, further encouraging them to be mindful and focused on the task at hand.
Related: DIY Rainbow Water Bead Sensory Bottles – Mindfulness Tool
Here’s our YouTube video that will show you step-by-step how to create this beautiful glitter sensory bottle.
For today’s sensory bottles you’ll need:
- HB Empty Sensory Bottles (Voss water bottles are also perfect for this)
- 1/2 cup of Clear/glitter glue
- 1 cup of Water
- Funnel
- Glitter (the more the better!)
- Food Colouring/liquid watercolour paint (optional)
- Goo gone to remove the glue from the label on the Voss water bottle (optional)
- Glue gun for sealing the lid (optional)

Step 1 – Prepare your materials
- If necessary, prepare your bottle by emptying it’s contents and removing all labels. If you have difficulty removing the labels, using Goo Gone might be helpful.

Step 2 – Add Water to Your Bottle
- Fill up your bottle halfway with very warm water (tap water is fine).

Step 3 – Add Clear/Glitter Glue
- I added glue until the bottle was ¾ full.
- Put the lid on.
- Give your bottle a good shake to combine the glue and water.

Step 4 – Add Your Glitter (Go Crazy!)
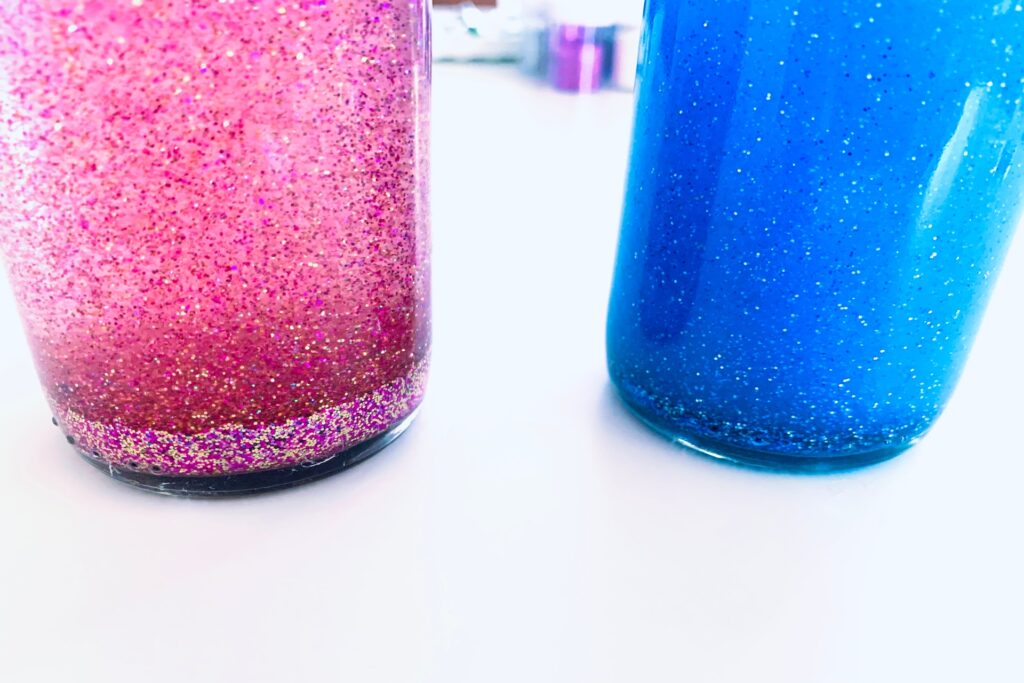
- I added 3 tsps of glitter to each jar. We used 1 tsp each of silver, light blue, and dark blue glitter in the sensory bottle that Chloé created.

Step 5 – Add Food Colouring or Liquid Watercolor Paint (optional)
- Choose a food colouring or liquid watercolor paint that is similar to the glitter you are using in your sensory bottle.
- Add as much or as little colour as you’d like!
- Put the lid on.
- Give your bottle a good shake to check the viscosity of your mixture.

Step 6 – Fill up the Rest of Your Bottle With Glue or Water
- Based on the movement of your glitter you can fill up the rest of your bottle with a combination of glue or water – If your glitter moves too quickly, add more glue. If it moves too slowly, add more water.
- Put the lid on.
- Shake the bottle gently.

Step 7 – Shake, Shake, Shake
- When you are satisfied with the movement of the glitter, put your lid on, give it a good shake and observe the magic! If you’re using these bottles in the classroom or with very young children, I suggest that you add a little bit of hot glue to the inside of the cap to prevent little ones from opening it.

Step 8 – Enjoy!
Chanel made a gold and pink glitter bottle and added a few drops of red food colouring. I made one using gold glitter and yellow food colouring. This is what the bottles look like when they’re flipped over.

This is what our glitter sensory bottles looked like when they were shaken.
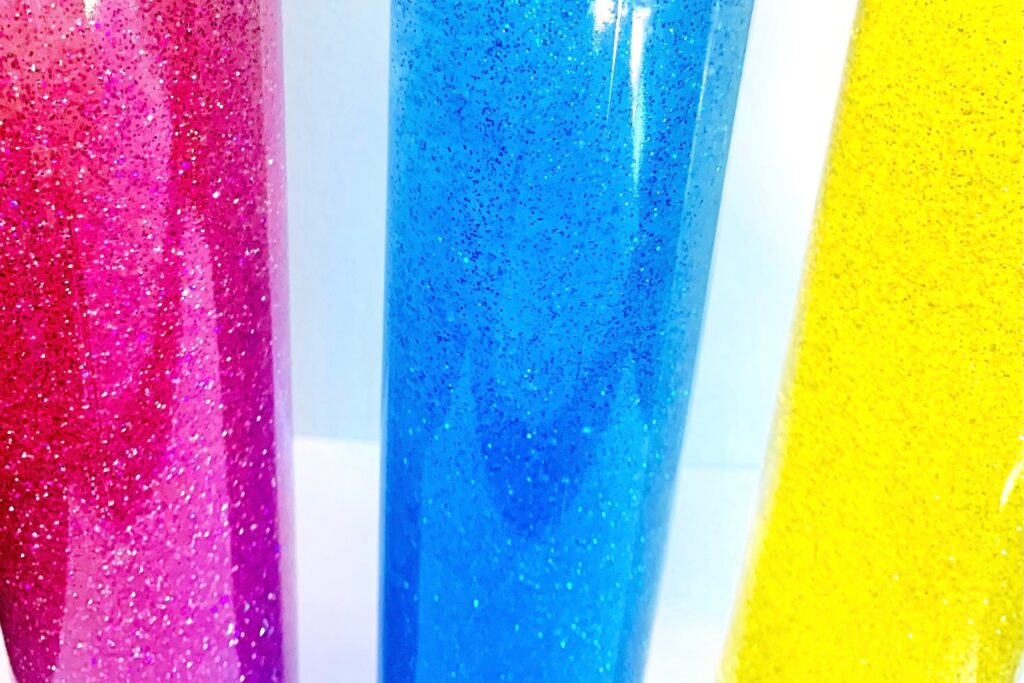
My daughters, Chanel and Chloé thoroughly enjoyed making these glitter sensory bottles. We have made many sensory bottles over the years and they both consider these to be one of their favourite. It’s beautiful to watch the glitter spiral through the liquid in the bottle; creating interesting patterns along the way. Another amazing aspect of these bottles is that there are so many variations. You can literally add any small insoluble objects to your glitter bottles to add interest and depth. Tap into your child’s interests and get their insight as to what they’d like to add to their glitter sensory bottles.
I hope that you have fun completing this activity! I’d love to hear from you. Send me your questions, comments, or ideas for any art activities that you’d like me to create. Please let me know how your glitter sensory bottles turn out!
Sources
- Sensory Bottle Tips, Uses and Benefits for Children. 27 Sept. 2020, https://yogaloreandmore.com/sensory-bottle-benefits/ Accessed 22 Mar. 2021.
9 thoughts on “How to Make a Sensory Bottle – Glitter Bottle”
We love sensory bottles! We actually just made a glitter one yesterday with rainbow colors and using hair gel. We have to try this one next.
That’s so awesome! I love the movement of the glitter through the hair gel. Super cool!
I’m so excited to try this with my nieces. They are 3 and 9 and this is something that will be fun to do and will give them something to focus on if they ever start to feel stress. Saving this for when I see them in a few weeks!
They will definitely love it! They also last forever, so your nieces will get a lot of good out of these glitter bottles.
I’ve seen sensory bottles that use water beads or small toys, but these glitter ones are so pretty! We will have to try this soon!
These look super cool and surprisingly, pretty simple to make! With summer here, we’re always looking for things to do to keep my kiddos busy!
Great idea! These would be perfect for a summer activity and it’ll keep the kids occupied for a while. Let me know how they turn out 🙂
I love the idea of sensory bottles but can never get them just right. This looks like a perfect tutorial and I will be trying it soon. Thanks for sharing!
I know what you mean! We’ve tried so many sensory bottles over the years, so we’re happy to share these simple yet effective techniques with you.
Comments are closed.